“You can't correct your problems without getting the bad with the good, and since our customers are given an outlet to voice concerns through LoyaltyLoop, we are now running at a much higher satisfaction rating than ever before. Thank you!”
PrintVis
Integration Add-On
PARTNER INTEGRATION
Automate your Customer Experience (CX) Process with PrintVis!
LoyaltyLoop is the perfect customer experience and review platform for printers and sign & graphics companies.
By partnering with the great team at PrintVis, you can now combine the power of your business management MIS/ERP system with the LoyaltyLoop customer experience platform to automate your feedback and review process.
- Set it, and forget it!
- Engage customer soon after their transaction
- Send requests as often as daily
- Monitor and take action in PrintVis
Owners, operators, and managers of printer businesses understand the importance of creating great customer experiences. Employ a consistent process of engaging customers to learn from their experiences, and do not rely on gut feel and hunches.

How much does it cost?
There is no additional cost.
What does the integration with PrintVis do?
This full-cycle integration automatically flows customer contacts in PrintVis for recent transactions into LoyaltyLoop, automating the feedback process. And, feedback results automatically flow from LoyaltyLoop back into PrintVis, allowing users to easily monitor customer sentiments and act quickly.
- Your PrintVis contact record will be annotated with details from that customer's LoyaltyLoop survey response
- View customer survey response, NPS disposition (e.g. Promoter, Passive, Detractor), and more
- View critical actions you need to take based on feedback, from your Prophet Alerts
- Click and launch into LoyaltyLoop from PrintVis to see all customer experience details
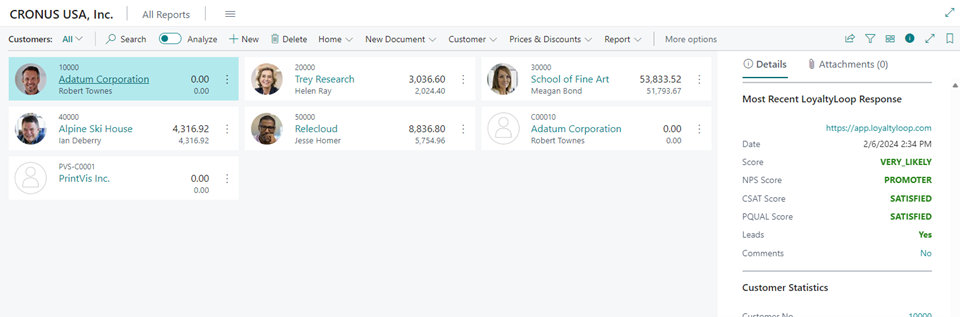
View recent LoyaltyLoop survey responses inside PrintVis. LoyaltyLoop response data will be sent back into PrintVis based on the frequency setup within the job queue. This data can be found on the Customer list, Customer card, Contact list, Contact card, PrintVis Case list, and PrintVis Case card in the factbox. The Contact locations are responses based on the specific email of the contact and the Customer and PrintVis Case locations are based on all the contact email addresses for the customer.

View detailed LoyaltyLoop survey responses inside PrintVis. Clicking on any of the scores will bring you to the detailed responses for that customer. Clicking on Leads or Comments from the factbox will bring up the list of leads or comments for the most recent response.
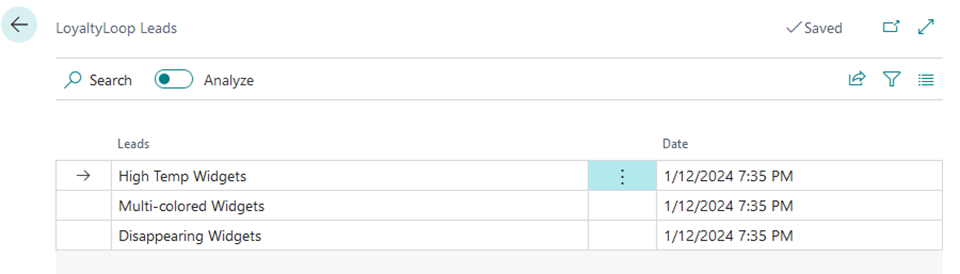
View LoyaltyLoop Lead & Referral survey responses inside PrintVis. If any comments, leads, or referrals were completed in the response, the first of those values will be displayed on scores response list and any additional entries can be viewed by clicking one of the “View” actions in the menu.
How do I enable my PrintVis Integration?
The process is simple. You will first configure PrintVis to send contacts to LoyaltyLoop, then you'll configure PrintVis to receive responses from LoyaltyLoop. Here are the steps:
Before you begin, get your LoyaltyLoop API Key
Before you begin the connection in PrintVis, create your LoyaltyLoop API key.
- Sign into LoyaltyLoop with an Admin user account
- Click your username, then Settings, then API Keys
- Click the plus (+) button to create a new API Key
- Label the API Key "PrintVis", and copy the Key to a Notepad or other file (or just to your clipboard)
1. Install PrintVis LoyaltyLoop Integration app.
Option 1: Install the PrintVis LoyaltyLoop Integration app from the Extension Marketplace.
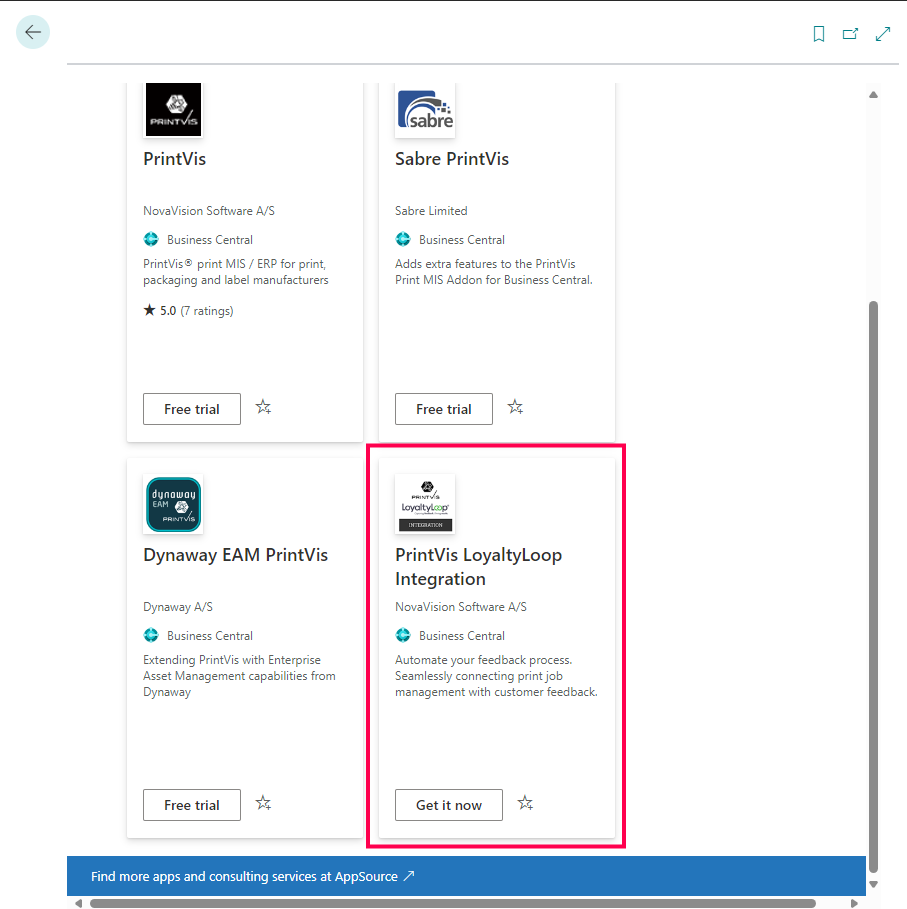
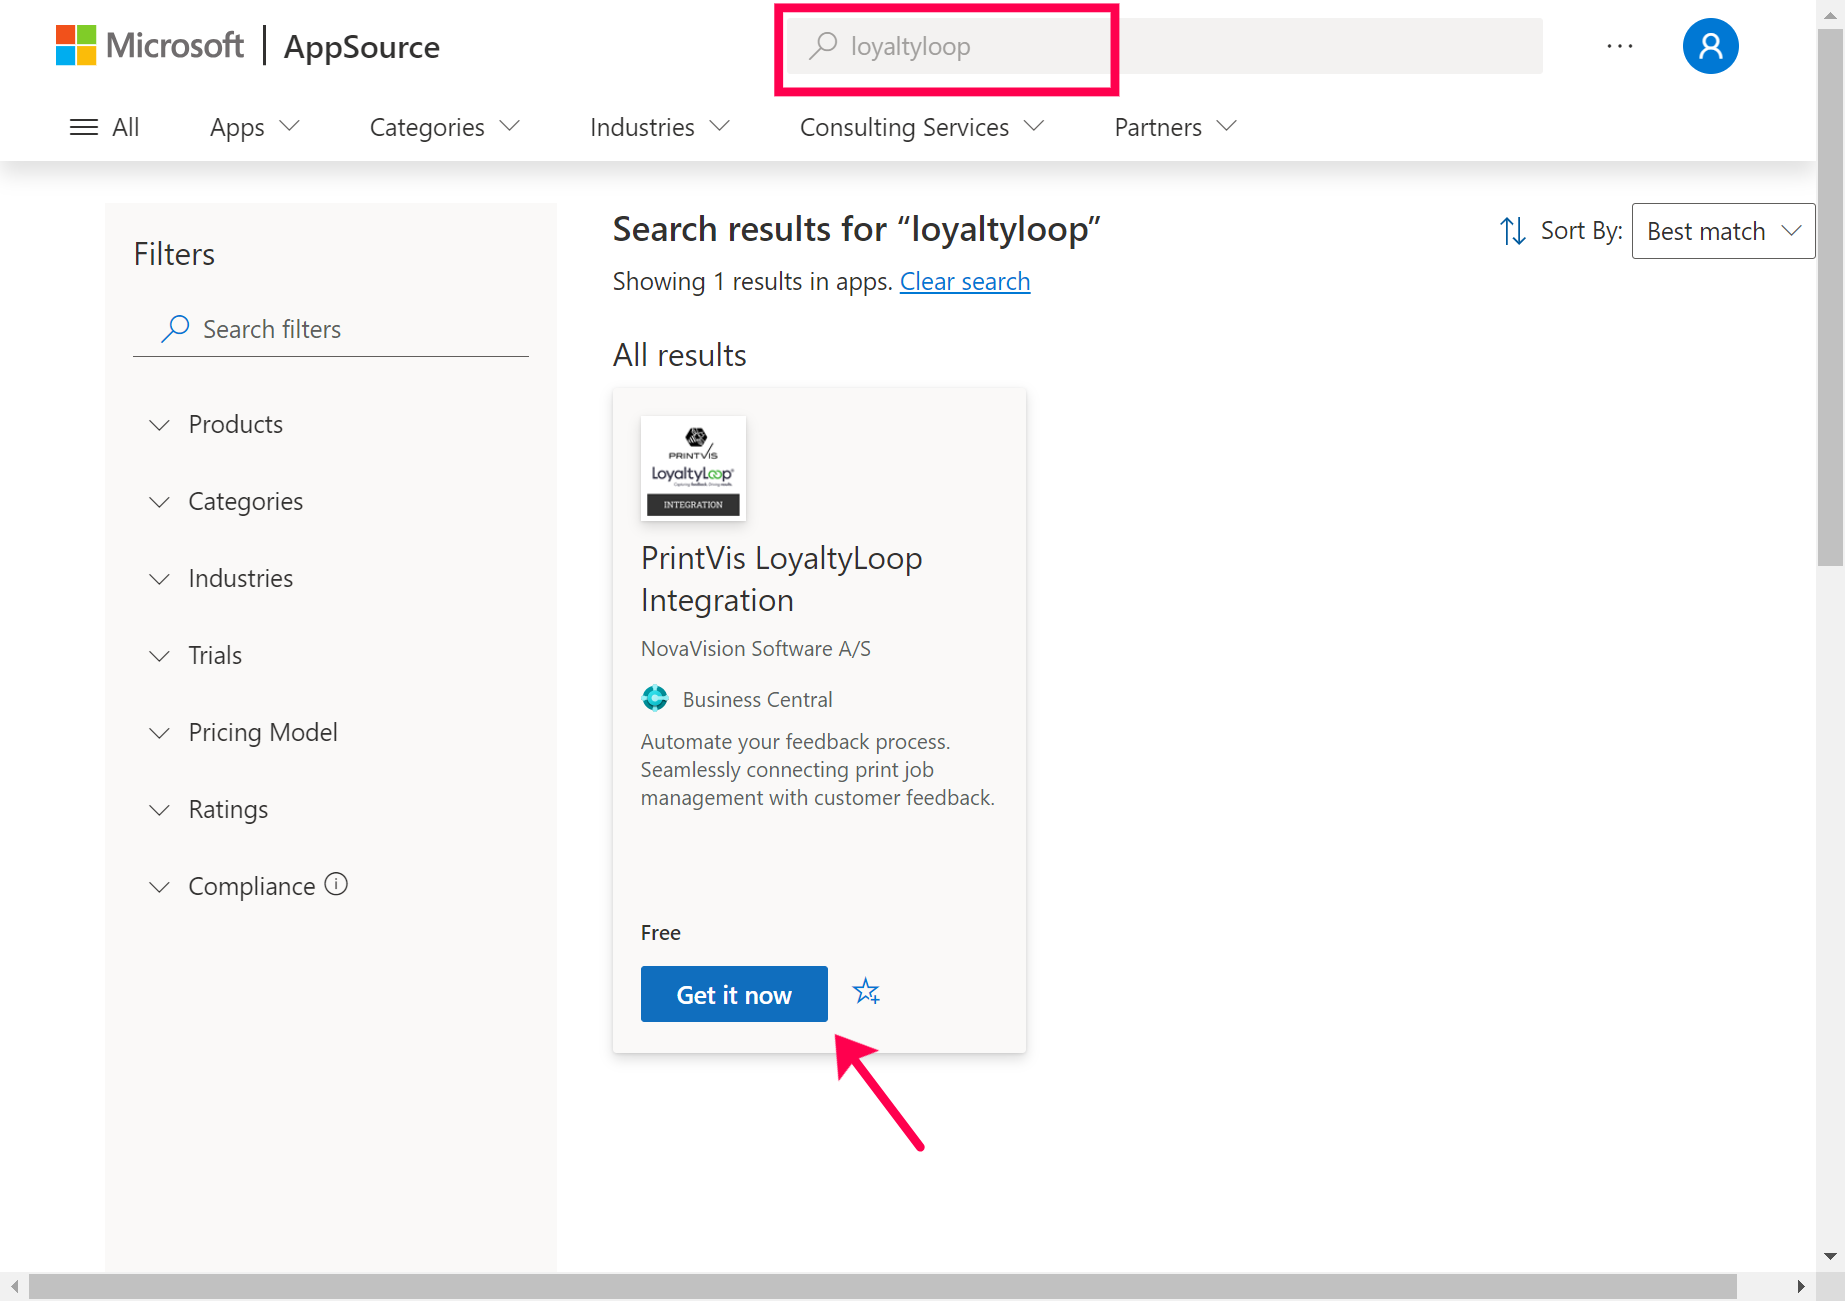
Option 2: Install the PrintVis LoyaltyLoop Integration app directly from Microsoft AppSource.
2. Establish the service connection
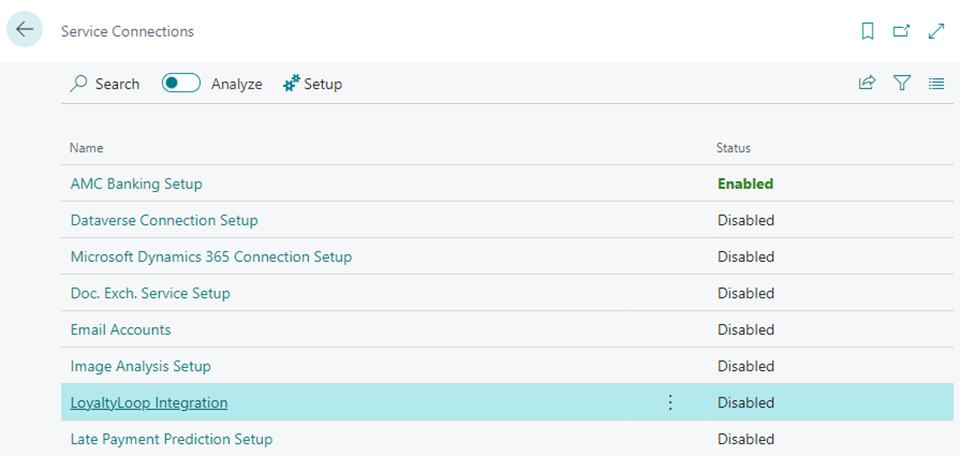
Sign into PrintVis, and search for the Service Connections page and select LoyaltyLoop Integration
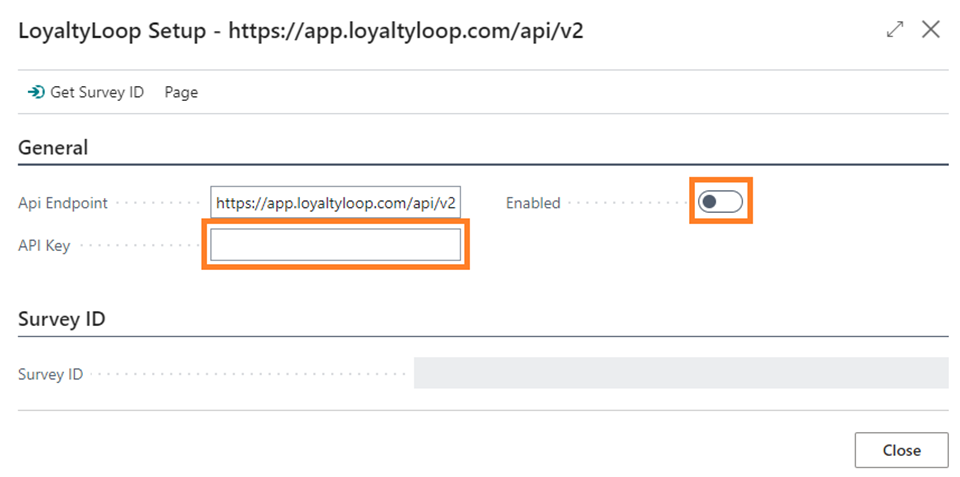
3. Enter your LoyaltyLoop API key and click the Enabled checkbox
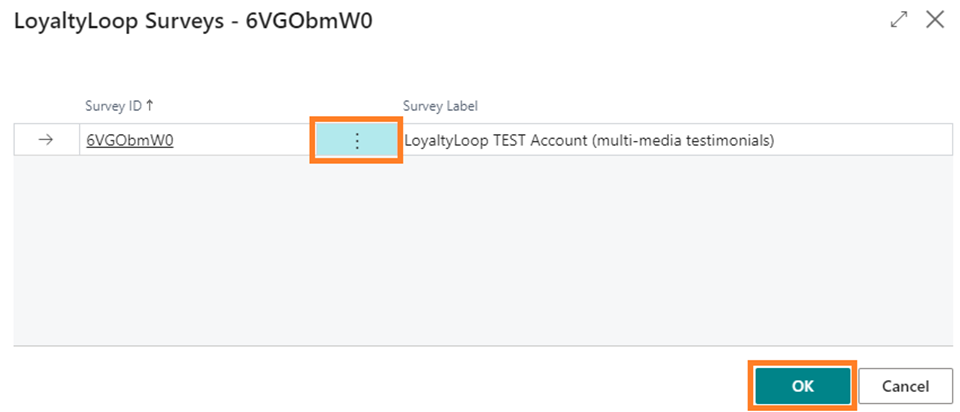
4. Click Get Survey ID to display a list of surveys you have setup at LoyaltyLoop

5. Select the survey to connect to PrintVis and click OK
Now, your survey is connected, and contacts from recent PrintVis transactions will be sent to your LoyaltyLoop account.
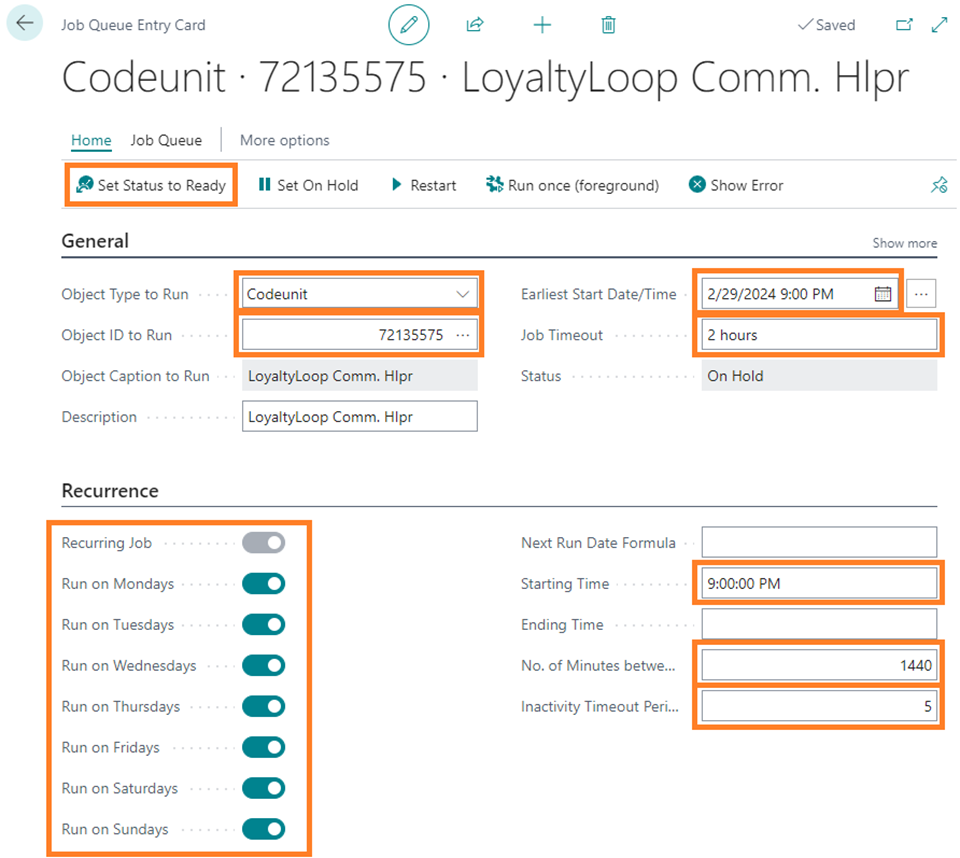
6. Schedule LoyaltyLoop Response Updates into PrintVis
If you want to see LoyaltyLoop response data from the customer or contact pages, you will need to setup a job queue and schedule how often you want PrintVis to get updated LoyaltyLoop information.
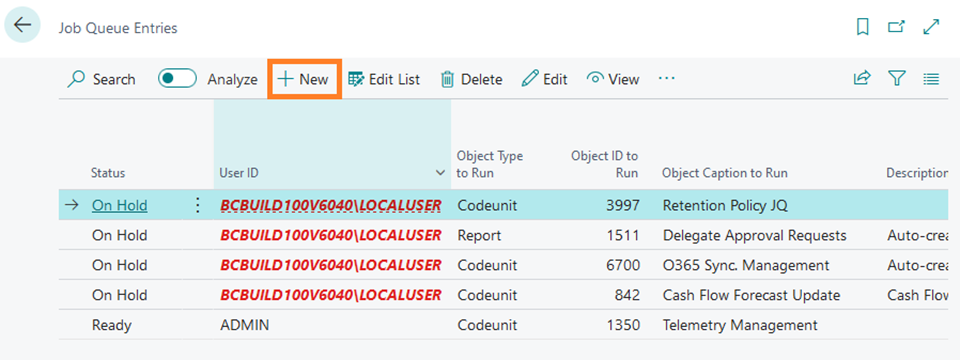
7. Schedule LoyaltyLoop Response Updates into PrintVis
Complete the highlighted fields and click Set Status to Ready. In the below example PrintVis will receive updated LoyaltyLoop responses at 9:00pm everyday starting February 29, 2024.
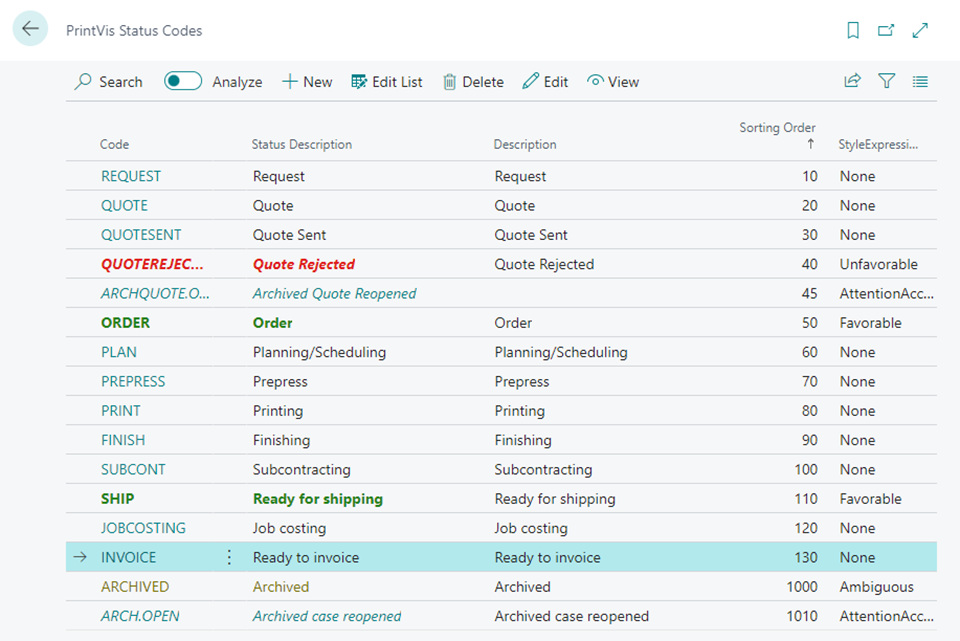
8. Set Status Code that will send data to LoyaltyLoop
To send PrintVis case (order) information to LoyaltyLoop, you will need to setup at which status you want the data sent. Search Status Codes and select the Status Code you want to use to send data to LoyaltyLoop.
9. In the Integration section, click the Send Case Data to LoyaltyLoop checkbox
How does the integration behave when sending data to LoyaltyLoop
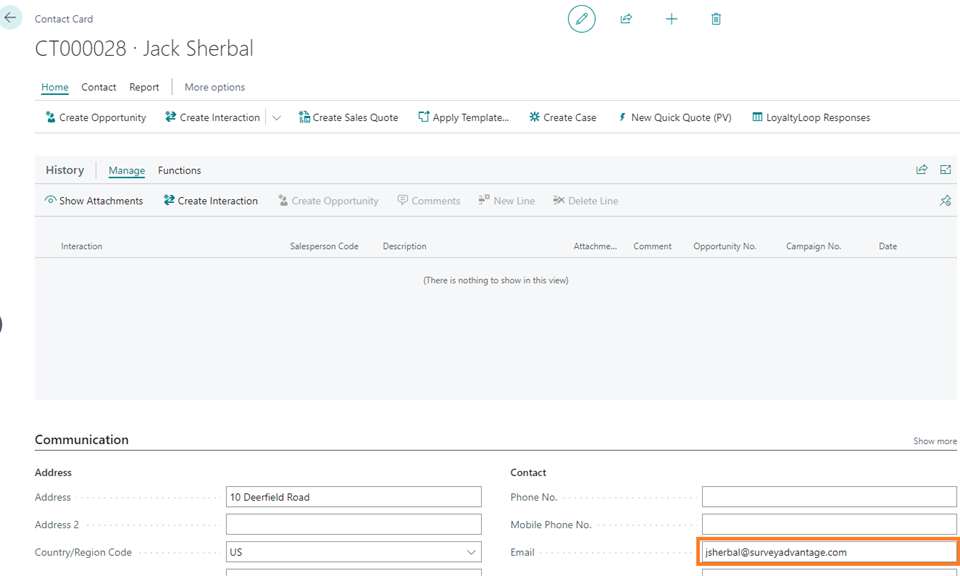
The LoyaltyLoop integration will use the email address from the Sell-To Contact when sending data to LoyaltyLoop. If the case does not have a contact or the contact email is blank sending to LoyaltyLoop will be skipped.
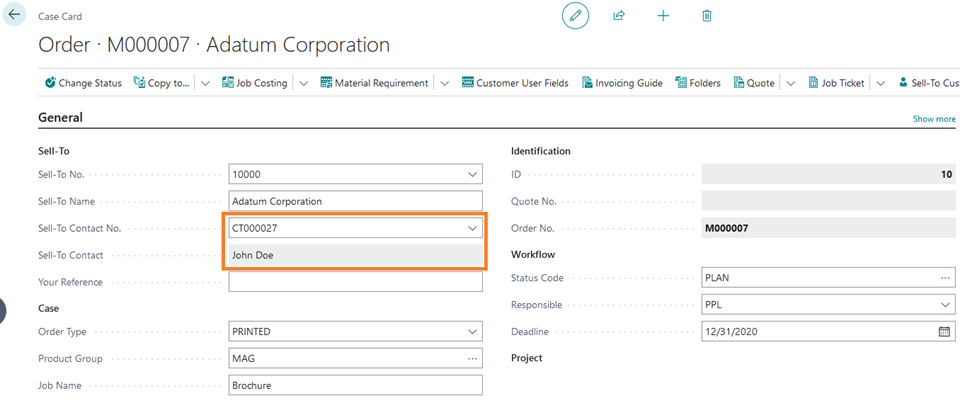
The email address is set up in the communication section of the contact.
Which PrintVis fields are included in the integration?
Once the case moves to the Status Code with the LoyaltyLoop checkbox checked, the following case data will automatically be sent to LoyaltyLoop:
- Sell-to contact email
- Sell-to contact name
- Sell-to contact organizational level
- Sell-to contact company name
- Sell-to contact address
- Sell-to contact phone
- Sell-to contact mobile phone
- Send date/time
- Case coordinator
- Case salesperson
- Case sell-to number
- Case order number
- Case order type
- Case job name
- Case your reference (PO)
- Sum of all active order job lines quote price
Can I impose a standard delay when sending my survey?
Yes. To ensure your customer has had the appropriate amount of time to experience your product or service, you can impose a delay on sending your survey. As stated below, we will set a 3-day delay on the default launch configuration. If you prefer something else, please contact our support team at support@loyaltyloop.com, or 888-552-5667 option 3. Here's a blog post explaining imposed launch delays.
How do I change my survey send (launch) frequency?
With the integration enabled, your data flows to LoyaltyLoop as you close transactions. You are now in position to have your surveys sent soon after the customer experiences your business.
By default, and unless you specify otherwise, upon activation of the integration LoyaltyLoop will reconfigure your survey launch configuration as follows:
- Weekly Launch Frequency
- Default Launching Day on Tuesday
- Imposed 3-day delay
If you'd like a different launch configuration, please contact our support team at support@loyaltyloop.com or 888-552-5667 option 3.
Your existing Touch Frequency Filter (TFF) will be maintained. For example, our default TFF is 90-days, meaning customers (based on email address) who have been asked to give you feedback within the prior 90-days (or as per your specific setting), will be removed from your launch. This prevents "over-touching" the same person too often.